

Using Facebook Ads to drive real sales and results is no longer a myth, but are you taking full advantage of what Facebook has to offer?
Targeting on Facebook ads is very effective. They have so much information at their fingertips to help advertisers target their market.
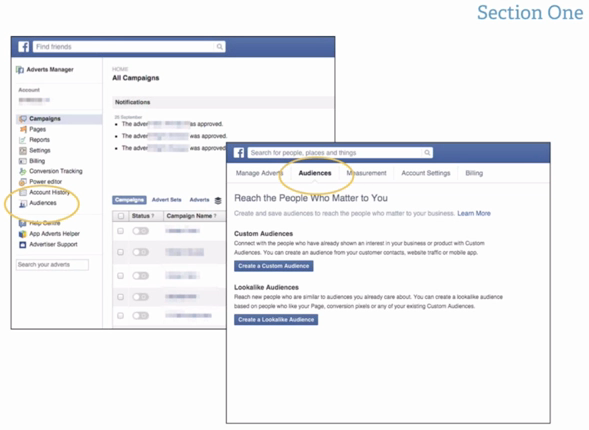
You can target by age, gender, location, interests and more. You can also use partner data and target by life events/behaviors, net worth/income, political affiliation, and household composition. Most importantly is your data: your website visitors, current purchasers, high lifetime value customers, and loyalty club members. This last category is where Facebook Custom Audiences works. It’s a way to target those people using Facebook.
Related: All about Facebook custom audience
When you go to your Ad Manager on Facebook and look for the audiences tab, click on the button
Then you’ll get this:
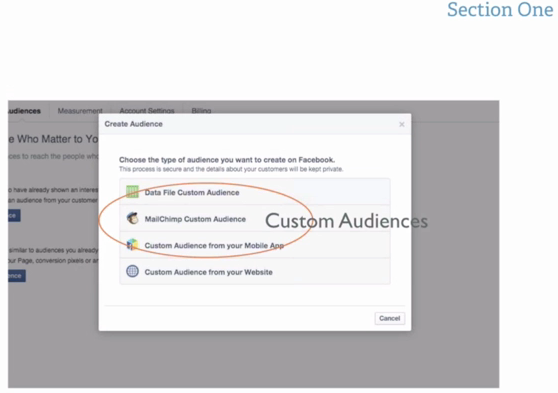
Your first three—Data File Customer Audience, MailChimp Custom Audience and Custom Audience from your Mobile App—are called your regular customer audiences. You can upload onto Data File to create a custom audience. With MailChimp, you can link to your MailChimp account and get data from your mailing list. From your mobile app, you put in your mobile app ID and create custom audiences. The fourth option is creating custom audiences from your website.
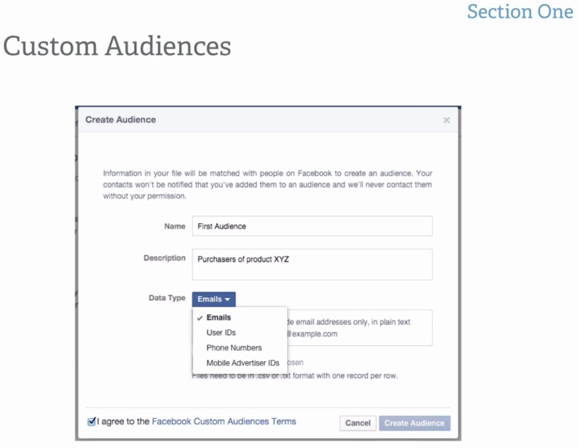
To create custom audiences from a Data File, you need to get that data. Get the data from your customers, whether it is emails or user IDs. You can upload the data in CSV or text format, so make sure you only have one record per row and only one type of data per file. Only use emails, user IDs, phone numbers or mobile advertiser IDs. You can upload this to Facebook.
Be sure to read through the Facebook Custom Audiences terms. Make sure you’ve gotten all the data legally and with the consent of the user. You can get penalized if you are scraping data.
If it all looks good, you then just upload the CSV or text file. Unfortunately, this is a manual upload, so every time you want to update it, you have to export the data, put it into .csv and upload it to create a new custom audience.
Now let’s look at website custom audiences. In order to use a website custom audience, you will need to have a custom audience pixel, which is a snippet of code you put into your website source code.
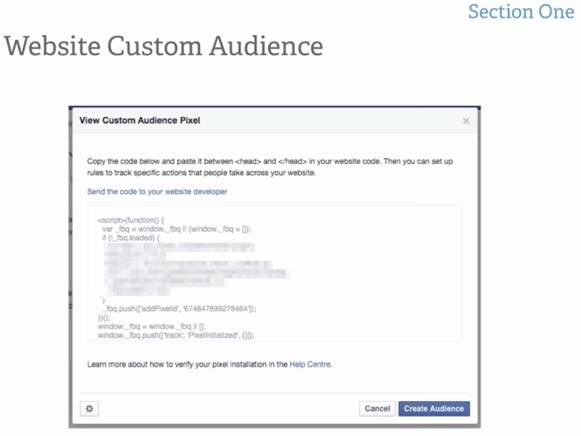
You can customize this code to track any action. This can be a visit to your page, adding an item to the shopping cart, adding an item to a wish list, etc. You can get very creative with this. When you have the pixel installed on your website, it triggers every time someone does any of the actions you specify. If you want more information on how to customize it, go to this Custom Audiences overview page.
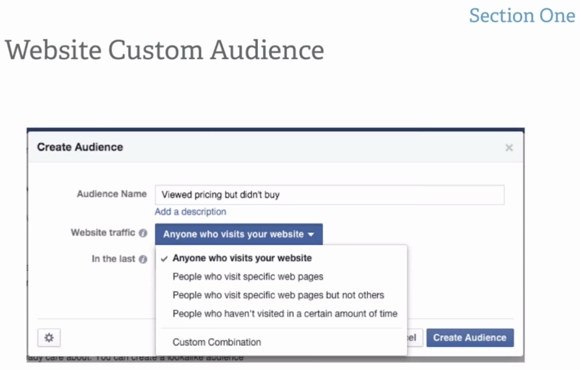
Here, you can create rules for different custom audiences. In the past, you could only create website custom audiences from URLs. Now you can do a custom combination for whatever you want. This way, you can show really targeted ads for people who come to your website. In Facebook Custom Audiences, you can say how long you want to track the data with a maximum of 180 days.
A couple of things worth mentioning:
Custom Audiences can take up to 36 hours to fully process.
Facebook doesn’t deliver ads to audiences of less than 20 people.
Audience size is not always accurate on Facebook. When you look at the list of custom audiences, it will tell you the name and the estimated audience size. The numbers never add up.


